Easy, Delicious, Homemade Hummus

Author: Veronica Hilliard

Homemade Hummus :: Pen Pals and Cookin' Gals

I love, love hummus. Not just like it. I LOVE IT! As I try to get away from preservatives and processed foods, I have been meaning to find the perfect hummus recipe. After all, hummus is a super food!
Chickpeas (also called garbanzo beans in case you’re searching the shelves in vain) are rich in fiber and protein. They have more folic acid (folate) than most beans. They are high in magnesium and iron.  Tahini (sesame butter) adds some calcium and more iron. Due to the chickpeas and tahini, hummus is high in Omega-3 and-6 fatty acids. These are essential fatty acids for brain function and health. They are good for skin, hair, bones, metabolism and reproductive health. Beans naturally contain protease inhibitors, saponins, and phytic acid, which the American Institute for Cancer Research says might be protective against cancer causing cell damage.  And hummus is also a good source of monounsaturated fats. Call these the “good fats!” Hummus is cancer-fighting, brain food!

Check out the back of any store bought brand that adds in things like High Fructose Corn Syrup, a highly processed sugar, and Sodium Benzoate, an unnatural preservative, and I begin to feel a little leery of this “healthy” dip. Some also include preservatives, such as citric acid, sorbic acid, and phosphoric acid. These are generally recognized as safe by the FDA as long as they come from good manufacturing practices. Manufactured… what am I, a car?  But as I look at the ingredients in my foods, I want to make sure that all of it is beneficial to my body. Citric acid is found naturally in citrus fruits. Sorbic acid is found naturally in the unripe Sorbus aucuparia fruit. Phosphoric acid is found naturally in meats and dairy. Why can’t I just get what I need from a natural source?

Cue delicious and healthy HUMMUS!

Hummus is traditionally made from a few ingredients but can be added to in so many wonderful ways. Start with a base of chickpeas, tahini, citrus (usually lemon) juice or vinegar, garlic, a little salt, and oil. Add spices of your choice and any number of other flavor enhancing ingredients. I’ve seen it with oregano, artichoke, roasted eggplant, roasted pepper, roasted garlic, olives, spicy chili peppers, lemon, pine nut, jalapeno, and sun-dried tomato. You can make it however it strikes your fancy. Today, just for you, I’ve made a simple hummus. It’s a good place to start.

Homemade Hummus :: Pen Pals and Cookin' Gals

Start by gathering your ingredients. Tahini (I get mine here. A little bit goes a long way so don’t freak out about the price.), chickpeas (canned or dried), oil of choice (I use extra virgin olive oil), ground cumin, salt, lemon juice, and garlic. I, of course, didn’t have lemons. But I did have grapefruit. Tomayto, tomahto. 🙂

Cat on the Counter :: Homemade Hummus :: Pen Pals and Cookin' Gals

Next step: Shoo your cat off the counter. I can’t work in these conditions!

Homemade Hummus :: Pen Pals and Cookin' Gals

In researching recipes (what, not everyone does that?) I found one that called for whipping the tahini and citrus juice first. I think that this is a key step to making beautifully smooth hummus. Try it next time and see what you think.

Next add everything else.

Homemade Hummus :: Pen Pals and Cookin' Gals

Then add the drained and rinsed chickpeas 1/2 first. Give it a whirl. Then add the rest. Blend it in the processor until it’s creamy. If you’re having trouble at the end, a little drizzle of water can work it all out.

Homemade Hummus :: Pen Pals and Cookin' Gals

Garnish and Mmmm! Mine has a little paprika and cilantro. Easy. Delicious. Homemade. You know what went into it and it’s good for you. Can’t get much better than that.

Homemade Hummus :: Pen Pals and Cookin' Gals

Basic Hummus Recipe: Modified from this one.

  • 1/4 cup tahini
  • 1/4 cup any tart citrus juice or vinegar
  • 1/2 to 1 large garlic clove, minced (depending on how much you love garlic)
  • 2 tablespoons healthy oil, plus more for serving (Canola oil is not healthy)
  • 1/2 to 1 teaspoon salt to taste
  • 1/2 teaspoon ground cumin
  • 15-ounce can chickpeas/garbanzo beans, drained and rinsed
  • 2 to 3 tablespoons water
  • Garnish (paprika, herbs, olives, etc)

Blend together tahini and citrus juice. Add garlic, oil, salt, and cumin. Blend until incorporated. Add half the chickpeas. Blend. Add the other half. Blend until smooth, adding water slowly while blending if it needs a little help. Scoop out and serve!

~~~

Now, if you want to skip all this (it’s easy, I promise!) and buy something from the store, please avoid all the unnecessary disgusting sugars and preservatives. Check your labels and know your ingredients. If you can’t pronounce it, don’t eat it. The only brands that I’ve found that don’t use those nasty additions are Wild Garden Hummus for on the go, and Fantastic Foods Hummus Mix.

How to eat hummus. You know, other than dipping your whole arm into it and licking it off? What, that’s just me again?

Try it on crackers or your favorite sandwich. Dip all the veggies! Add your favorite homemade broth or some water until it reaches a consistency you like and make salad dressing.  Spread it on beef or fish. Any way you try it, it’s good… and super good for you.

How do you eat your hummus? What have you added that makes it really pop?

Friday’s Flavor: Chicken & broccoli with homemade garlic alfredo sauce

166776_600057243356380_1074336124_n

Author: Cassie Stevens

I’m a big fan of a great creamy Alfredo sauce, or just about anything with pasta. I had never made my own Alfredo sauce before now. I will tell you I will never buy another store bought jar again.  I loved it, and so did my husband.  My husband is a “picky” eater and he is lactose intolerant. He is not a big fan of Alfredo sauce but he still eats it.  This recipe for homemade Alfredo sauce is super easy and simple.

1/4 cup butter

1 cup heavy cream

4-5 cloves garlic, crushed

1 1/2 cups freshly grated Parmesan cheese

1/4 cup chopped fresh parsley

Melt the butter in a sauce pan, add the garlic, once the garlic is fragrant add the cream and the cheese parsley and I also added black pepper. Mix with a whisk to incorporate the cheese. Once the cheese is melted add the chicken then the broccoli and serve over Bowtie pasta with Garlic toast. Viola! Homemade Alfredo sauce.

484842_600056630023108_360244629_n540115_600057070023064_837435562_n

221638_600057046689733_1403781103_n208886_600057063356398_1996564061_n

7368_600057100023061_1070100203_n481905_600057163356388_282269219_n

An Easter Story & Treats

Author: Cassie Stevens

I know I’m a little late posting my about my Easter. But with the beginning of every month comes the paying the  bills, running errands and all the other responsibilities that go with that. I hope everyone had a wonderful and memorable Easter.  I know we did.  We almost missed the Easter bunny (funny story).  I looked up on-line when my town was doing their Easter egg hunt this year, and I found out that it was at the county courthouse on the front lawn. The posting I found said March 30, 2013 at  one o’clock for the Easter egg hunt ages 0-12 and the Easter bunny would be there to take pictures for only three dollars.  I was thrilled. I wrote it on the calendar so I wouldn’t forget.  I had already got my one year old an Easter dress, we just needed to find the right shoes to go with her outfit. I went to three different stores and drove all around town before we found the right ones. OK set, ready for the Easter bunny pictures tomorrow.

So Saturday comes and we get ready to go, get all loaded in the car, head on out to the courthouse.  When we get there it’s a ghost town. Nobody is around. I was a little early but I expected a few people to be there already. I had seen a sign in one of the overflow parking lots that said “temporary courthouse parking”.  So then I thought I missed it.  I was so mad. SO MAD! I went through all that trouble for the stupid Easter bunny pictures and got nothing for it. My daughter is too young to know any different, but if she wasn’t… oh would I have a mess on my hands. So I decided to go to the police station just around the corner and ask them they would know what’s going on for sure.  I got there and rang the clerk on duty. She told me that there were three today; one was at 10:30 and another was at 11:00 and the last was at 1:00 but it was in the next town over which was about an hour drive from us.  So again, I left disappointed and upset that I wasn’t more on top of these kind of things.  I should have called to make sure where they were the day before. I shouldn’t have trusted a stupid posting on some web site I knew nothing about. Live and learn.  So I decided to go about my business and get a few items I needed for Easter dinner on Sunday.

On the way to the grocery store I decided I wasn’t going to let the day go totally to waste. After all my daughter looked so gorgeous in her Easter  dress. I decided to take a few pictures of her in front of some really pretty flowers. Just get some good pictures of her in her outfit, and I knew just the place.  I went to the Christmas place (were it’s Christmas all year round). I knew they had some really pretty flowers and backdrops we could photograph and take some great Easter pictures. So we walked around for a bit snapping photos and just having fun in the sun.

SAM_0521SAM_0520SAM_0523

I looked across the street and saw The Inn at The Christmas Place, which is a hotel were it is Christmas all the time. Well, I saw that there was a beautiful waterfall and some ducks and more pretty flowers on the other side of the street. So we loaded up  in the car and drove across the street to take more pictures.  As we were driving past, I noticed Easter eggs all over the front lawn and the side lawn.

Then, I noticed a very small sign that read “Easter egg hunt”.  I thought for a second, we were in luck. So we went to investigate. We took the long way around so we could play with the eggs first. We went around the side lawn and got to snap a few pictures all by ourselves picking up Easter eggs (which we put back) and just having a good ol’ time.

SAM_0530SAM_0532SAM_0531

As we made our way around the front of the hotel, I saw even more egg hunt sites that were sectioned off for different age groups. I asked the manager I saw walking around about the Easter egg hunt.  She told me the Easter egg hunt was at four o’clock (it was three) and it was for the guests of the hotel only and I would have to go to the front desk to get a voucher. She had also mentioned the Easter Bunny would be there to take pictures until about four thirty or so.

YAY!!! I finally found him! I was so excited I was going to wait around for him and take a few more pictures while we waited.  I turned on my camera and it shut off. I turned it back on and it said insufficient battery and shut itself back off.  NOOOOOOOOO!!!!!!! My battery is dead. I was going to get my pictures if it was going to kill me! Especially since I had the opportunity to do so.  I got us loaded back into the car and raced home (I only lived about ten minutes away).  Charged my camera for about thirty minutes and rushed back. I made it back right at four o’clock. When I am determined I will get it done and on time. We got back there, snapped a few pictures (as quick as we could before she started to cry) and success! I got pictures of my daughter with the Easter bunny. I was happy. Whew!! what a day! Time to go home and get ready for Easter dinner.

SAM_0536SAM_0535

Now for the treats:

I have seen a few ideas on-line for some awesome Easter treats ideas. I liked a few and wanted to try them out on my Family this year and see what the kids thought.

I found a cute idea for deviled Easter eggs that look like chicks from this site

Image

I found cute Easter Egg Basket cupcakes from this site

Image

Plus I made a few of my own.  I also made a cake with the leftover cupcake batter. All the icing is homemade.

Image

I hope you had as much fun as we did! Happy Easter! looking forward to doing it again next year!

April Fools Fun!

Author: Veronica Hilliard

For April 1st, April Fools Day, I wanted to make sure to do something tricky, but nice, to my family. Too often April Fools is some excuse for people to do mean and nasty things to each other. I really dislike that side of it. But it’s also a way to have some fun with your family and I am ALL about that! I found a few ideas online about switching dinner for dessert so what’s better than cupcakes for dessert and dessert first?!

Gotcha! My cupcakes were meatloaf with mashed potato frosting! I wanted to make sure I packed these full of veggies so that I wouldn’t ruin the moment with a big piece of broccoli next to it or something. It didn’t make them look yummy but they sure tasted spectacular!

100_4048


Meatloaf Recipe:

1 small onion (chopped)

1 bell pepper (chopped)

1 – 2 carrots (shredded)

1 lb ground beef

1/2 to 1 cup bread crumbs

1 egg

A big squirt of ketchup

Sautee onion, pepper, and carrots until soft. Add to ground beef and bread crumbs. Add egg and mix. Squirt a bunch of ketchup in there until it’s well moistened. Fill muffin cups with the mixture and bake about 15 to 20 minutes at 375 degrees F.

The “frosting” is instant mashed potatoes with a few drops of food coloring. I rarely use instant mashed but it was really perfect for the smooth look of the “frosting.”

100_4054

Pretty, huh?


And for dinner, same thing, right? Wrong…

100_4050

For “dinner” we had chocolate rice krispy treat meatloaf, ice cream mashed potatoes with caramel gravy and a Starburst candy butter pat, and cut up Starburst for carrots and corn. Tricky mommy!

We had so much fun fooling my oldest (3.5 years old). Did you play any clever (nice) tricks?

Easter Bread Baskets – (Photo Heavy)

 Author: Veronica Hilliard
100_4040

In the past year I have been trying to become a better baker. Something Cassie is already really good at! And getting good at making breads has been a personal goal for me. Not long ago I was browsing Pinterest (read “wasting time”) and found this post from The Italian Dish. Oh, her food photography is to die for! Anyway, I’ve kept it in the back of my mind for Easter and, surprise! I remembered to do it! Our family is young so we’re still starting some family traditions. I think this will be one that sticks with us year after year.

  100_3983   

Kneading

I didn’t proof my yeast. I use it all the time so I know it works. And with modern packaging and collection methods, fresh yeast is unlikely to fail. I just threw it in with everything but instead of rapid rise like the recipe said, I used my active dry yeast that I buy in bulk and keep in a glass jar in the fridge.

I got everything mixed together and then begged my hubby to take this totally posed picture. He laughed at me but obliged. I almost scrapped it, but I’m trying to be better about accepting myself and letting my daughters see me in front of the camera, loving myself despite my perceived flaws. So there I am! Posed and proud.

One thing my mom taught me about bread is that you just keep putting flour in until “the dough won’t take any more.” This recipe called for approximately 3.5 cups of flour. Mine “took” 2 additional cups for a total of about 5.5 cups of flour! You just learn to let the dough talk to you. It’ll tell you how much it needs.

100_3995

Then you put it in a greased bowl and cover it. This is when I love having my Misto*. Fill that baby up with oil of any flavor, give it a few pumps, and you have an oil mister with zero chemicals. Love it. Mine always has extra virgin olive oil in it. And I notice that I use way less oil this way.

Cover, and let the dough rise for an hour.

 100_4018

After The first rise. Look at that beauty!

 
100_4020

I cut my dough into 8 pieces though it called for 12. And I probably should have tried to do 12 because my bread baskets turned out a little bigger than you’d want to eat at one sitting.


100_4021

Twist the dough into braids. Tip: Let it sit for a minute so that the dough is workable. It has something to do with the gluten resting or something.

 
100_4023       
100_4027

Then you make these pretty little baskets and let them rise, covered with a dish towel for another hour.   

100_4025

There’s nothing like a beautiful egg wash on bread. Make sure you have some fun sprinkles on hand! Then place a dyed RAW Easter egg in the middle of each basket. Be careful with the raw eggs, my hubby accidentally tried to crack and eat one thinking it was a hard boiled egg before I got a chance to use it. Oops! It made it to the egg wash.

Sharing Time: I am a Mormon.

100_4028

Yes, we do celebrate Easter. We celebrate the Savior’s life and ministry everyday, but especially on Easter. This special time in the kitchen with my oldest daughter made an excellent object lesson for a discussion about the Savior. We talked about how after the Savior suffered and died for our sins, his body was placed in the tomb and then a big rock was rolled in front of the door. We put some sprinkles in the hole and then put the egg over the “door”.  Then, when we removed the egg after it was baked, the sprinkles were gone! Just like Jesus’ body was gone. His friends were very sad. But he came visit his friends with a perfect body and showed them that he had been resurrected (come back to life!) to live forever with our Heavenly Father. And we can have that as a promise to us that if we make good choices and try to be good people like Jesus was. Just like the sprinkles make us happy and are sweet, Heavenly Father’s and Jesus’ promise to us that we can live with them again makes us happy and is sweet. 

100_4030Bake at 350 degrees F for about 20 minutes.

 
100_4035

Aren’t they beautiful and festive?!


100_4032

These taste SO yummy. They are lightly sweet and were a major hit here. Will they grace your Easter table next year?

Recipe can be found HERE.

 
100_4008

I also made some naturally dyed eggs the day before when I made our dinner. The blue is made with purple cabbage. Yeah, it turns BLUE! And the yellow is made with turmeric. I wish I’d had some beets for red and some onion skins for a rich brown but I forgot to buy beets and onions were too expensive in our tiny local grocery store. Nothing was wasted. After dying my eggs I made my daughter’s favorite, sauteed purple cabbage, rice, and teriyaki chicken, flavored with turmeric!

So how did you celebrate this Easter? Did you start any traditions this year?

*I received no compensation for my praise of the Misto. It’s THAT good. 🙂

Homemade Granola and Almond Milk

Author: Veronica Hilliard

  Homemade Granola :: Pen Pals and Cookin' Gals Blog 

There are SO many reasons why we have cut out cereal from our diets. It’s ultra-processed, full of refined sugar, potentially full of GMO’s, and to quote Seinfeld’s Elaine, “Fake, fake, fake… fake!”  But my husband is not so keen on never having cereal again. So I have been meaning to make granola for a while now and yesterday, I finally tackled it.

I put the baby down for her nap thinking that would buy me about an hour to get this all put together and into the oven. I am really bad at following recipes. I just use them as a base for whatever I’m planning. In this case I decided I liked the looks of this granola recipe, so I loosely followed that one.

Homemade Granola :: Pen Pals and Cookin' Gals Blog

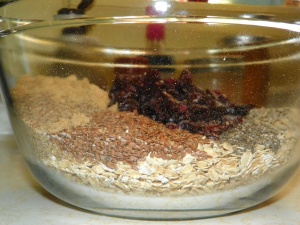
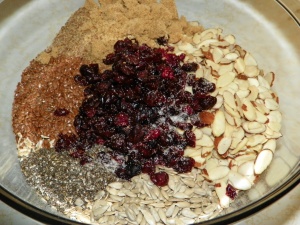
I compiled all the dry ingredients. Oats, whatever nuts and seed I had on hand which happened to be chia seeds, sunflower seeds, sliced almonds, flax meal, and flax seeds, and some dried cranberries. Another reason why I rarely follow recipes correctly is because I rarely have all the ingredients they call for so I just make it up as I go.

Homemade Granola :: Pen Pals and Cookin' Gals Blog

I used about half of everything called for since I didn’t want tons of granola in case nobody liked it. Then I added some brown sugar.

Homemade Granola :: Pen Pals and Cookin' Gals Blog

And DON’T forget the salt! It really brings it to the next level. I use Real Sea Salt.

Homemade Granola :: Pen Pals and Cookin' Gals Blog

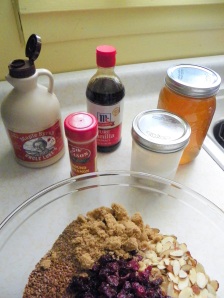
Next I got all my “wet” ingredients together. Maple syrup, cinnamon (not wet, just forgotten until now), vanilla, coconut oil, and honey. I don’t like most vegetable oils so I substituted Organic Extra Virgin Coconut Oil and I’m glad I did. It gives this granola a slight coconut flavor and it doesn’t taste greasy. Keep in mind while using coconut oil for cooking that it is higher in saturated fat than butter.

Because I didn’t pay much attention to the directions, this is where I did things VERY differently. The recipe says to put them all together with the sugar in a pan and then drizzle it over the dry stuff. I didn’t do that and it came out fine. But I might try that next time.

I finally got everything ready to go, turned on the oven, and then the baby woke up. She was cranky and still pretty tired so I went to get her and ended up nursing her for the next 20 minutes. I remembered the granola, and the hot oven, when I smelled smoke and went back into kitchen to smoke pouring out of oven from forgotten spilled cheese from hubby’s pizza the day before. Oops! And I hadn’t even put the granola in yet! 

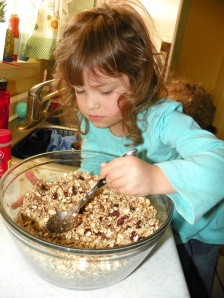
Then my 3.5 year old realized that I was making something and she wanted to help. So she stirred it for a bit while I dealt with the screaming toddler clinging to my leg. I was actually able to snap this picture in between the two of them screaming at each other and wanting to be on the same chair. See said toddler’s curly head in the background.

Homemade Granola :: Pen Pals and Cookin' Gals Blog

Finally, with the baby on my back in my Ergo, I was able to spread the granola out onto two cookie sheets lined with parchment paper. I probably didn’t need the paper but it made me feel better and cleaning up was a breeze. I was glad that I had cut the recipe in half now because I wouldn’t have enough cookie sheets to go around and would have had to have done this in two batches. It goes into a 325 degree oven for about 30 minutes (again, the recipe I followed is different. It said 20 but mine needed longer.) turning once or twice.

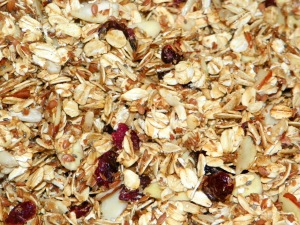
Homemade Granola :: Pen Pals and Cookin' Gals Blog

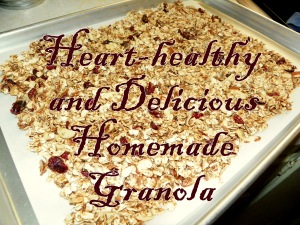
Ta Daaaa! This granola is delicious and lightly crunchy. It’s the perfect blend between sweet and salty and nutty.

Homemade Granola Recipe:

4 Cups Rolled Oats                                     1/4 Cup Brown Sugar

1/2 Cup Flax Meal                                     1/4 Cup Maple Syrup

1/2 Cup Chia Seeds                                   1/4 Cup Honey

1/2 Cup Sunflower Seeds                        1/2 Cup Coconut Oil – warmed

1/2 Cup Flax Seed                                     1/2 TBL Ground Cinnamon

1 Cup Sliced Almonds                              1/2 TBL Vanilla

1 Cup Dried Cranberries                         1/2 TBL Sea Salt

Preheat oven to 325 degrees F.

Combine dry ingredients, mix. Add wet ingredients, drizzling warmed to liquid coconut oil last, mix well. Spread on two large baking sheets and bake 20-30 minutes, turning once or twice until browned and toasted. Let cool completely on the baking sheets before storing.

**EDIT 3/29/13 


I recommend putting the dried fruit in after you bake your granola. Our craisins got very hard and chewy. Still yummy, but harder to eat. **

Add some homemade almond milk and you’ve got the best breakfast on the block! And to top it off, you know every ingredient that went into it.

Homemade Granola and Almond Milk :: Pen Pals and Cookin' Gals Blog

Almond milk is easy and in my opinion, tastes so much better than the store-bought kind. It tasted closer to skim milk and has no preservatives!

Homemade Almond Milk:

Soak 1 Cup almonds overnight or for at least 6 hours. Drain soaking water off. Blend almonds with 4 Cups of water for a couple of minutes. I strained off the liquid in a sieve and then strained it through cheesecloth. Then to make sure I got all the liquid out I put the almond “meal” into the cheesecloth and squeezed the last bit out by hand.

**EDIT 3/29/13 

I have found that adding 1-2 tsp of honey makes this “milk” that much better. And squeezing the last of the liquid from the almond meal is important. It thickens and flavors the “milk” a little more and helps if you choose to dry out your meal to use later. **

Oh, and after you make your homemade almond milk, take the leftover almond meal, bake it on a pan for about 20 minutes  to dry it out, and add it to your next batch of granola. Or use it to bread your fish for some nutty, crunchy breading. No waste!

Do you have a granola recipe you love? Have you made milk out of any other nuts, coconut, or rice?

Pizza! Pizza! Homemade Thin Crust

Author: Cassie StevensSAM_0369

Dough Recipe

2 1/2 tsp Yeast

1 cup Water

2 Tbsp Olive Oil

1/2 Tbsp Sugar

1 1/2 tsp Salt

3 cups Flour

Mix the warm water and the yeast let sit for 10 minutes. next add the olive oil, salt, sugar. Then add flour mix well knead dough by hand about 3 minutes. Place in a greased bowl and cover let rise for one hour or until doubled in size.  When doubled, cut dough in half. roll out to the size of your pizza pan let rest on pan for ten minutes then add toppings (I added hamburger and pepperoni) and bake at 450 until crispy and golden.

Chocolate Cake & Peanut butter frosting

SAM_0188
Cake recipe:
2 cups of sugar
2 ¾ cups flour
¾ cup cocoa powder
1 ½ tsp baking powder
1 ½ tsp baking soda
1 tsp salt
2 eggs
1 cup milk
2 tsp vanilla extract
1 cup boiling water.
Heat to a boil 1 cup water. In a large mixing bowl mix flour, sugar, cocoa powder, baking powder/soda, and salt. Slowly while whisking add milk then the boiling water. Then mix in vanilla extract, and eggs. Batter will be thin. Pour into your cake pan. Bake 350 for 45 minutes or until a toothpick inserted comes out clean.
Chocolate Frosting: 1 stick butter at room temp 2/3 cup cocoa powder 3 cups powdered sugar 1/3 cup milk 1 tsp vanilla extract. Mix well.
SAM_0226
Peanut Butter Frosting: ½ cup peanut butter 3 Tbsp powdered sugar. Mix together place in a microwave for 30 seconds and stir then drizzle over top of cake.

Baked spaghetti inside braided garlic bread

Author: Cassie StevensSAM_0553

1 recipes for basic white bread

Leftovers from spaghetti night

Mozzarella cheese (grated)

Pepperoni (optional)

Topping: Parmesan cheese, garlic powder, Italian seasoning, Parsley, and salt & pepper.


I love Spaghetti with meat sauce, and I like to cook like I’m feeding an army, so there are always leftovers.  This recipe is great for adding a little variety to your leftovers.  It combines two favorites, garlic bread and spaghetti. Around my house we call it spaghetti bread!
Here is how I do it:

I start with a basic white bread recipe. It makes 2 loaves so you can cut the recipe in half if you like but, I like to make a loaf of bread also when I make spaghetti bread.

SAM_0541

After the first rise dough I turn it out on to a floured surface and roll it out, not too thin, I would say about 3/8 inch thick.  I like to make sure I get a nice square out of it.

SAM_0542SAM_0543

Add a layer of cheese then your spaghetti then another layer of cheese and some pepperoni (optional).

SAM_0544 SAM_0545

Cut the dough then braid.

SAM_0547SAM_0550

Egg wash the top of your braided loaf. Sprinkle your topping mix. I then turn my oven on its lowest setting temp (which for my oven it’s 170 degrees) just until it reaches that temp then I shut it off. I then put the spaghetti bread in the oven to proof for about 10 to 15 minutes or so. I just want it to rise a little so the dough is not too thin.  When it has risen to the height I like I turn my oven on 350 degrees and bake it till it’s golden brown. The time will depend on your oven so I always just say to keep an eye on it. I recommend serving it up right away with a side of marinara.  It’s so crispy and delicious.

SAM_0559

I hope you enjoy this recipe as much as my family does.  Bon Appetite!

Basic White Bread

SAM_0592

Author: Cassie Stevens
Makes 2 loaves

2 1/2 cups warm water

4 1/2 tsp yeast or two packages

3 Tbsp sugar

3 Tbsp shortening or lard

3/4 Tbsp salt

6 cups flour

There is nothing like fresh bread. Especially when the smells fill your home.  I love, making homemade bread.  There is a certain sense of accomplishment to a good rise and that fresh taste.  Plus, I don’t use a mixer or a bread machine to mix my dough, I like to mix and knead my bread by hand so, it acts as a stress reliever too.

I start with the first three ingredients; mix the yeast, sugar, and water.  Let it sit about ten minutes until it froths up a little.  Then I add the lard, salt, and two cups of flour.  Mix well, add remaining flour one cup at a time, until you reach the last cup. Sprinkle a little of the last cup of flour on top of the dough in your bowl, and the rest onto the counter.  Roll the dough out of your bowl onto the floured surface and knead in the flour that you spread out on the counter. The dough should be soft but not sticky. I usually knead the dough about 8 to 10 minutes by hand. I will work in more flour if the dough is still too soft.  You will feel the dough stiffen up slightly when your kneading it.  That is when you can tell when to stop.  Once you make this recipe a few times you will get the hang of how it should look and feel for you. Every recipe gets better the more you make it.

Once you have the right consistency of your dough, spray a large bowl with cooking spray. and put it in the greased bowl upside down.  Flip it once to coat the top, cover the bowl with a kitchen towel and let rise for about an hour. If you don’t have a large bowl (cause it gets big) cut your dough ball in half and place in two bowls to rise.

After an hour or so, and your bread has doubled in size turn out onto a floured surface.  Immediately cut the dough in half and place one half back in the bowl. If you are making two loaves of bread (you could make dinner rolls, buns, or whatever you like), knead both halves for a minute or two, to work out all the air bubbles.  and place in two loaf pans.

Now, its time for the second rise. Turn your oven on to its lowest setting (mine is 170 degrees), just until it reaches it’s temp, then turn it off.  Place your loaf pans in to proof until it doubles and fills the loaf pans evenly. This won’t take long in a warm oven. You don’t want your dough to flow over the edges they will brown faster than the rest of the bread.  When your dough has risen a second time to your liking, pull your dough out and turn on your oven to 350 degrees.  Whip up an egg wash (one egg and a Tbsp water) and brush the top of each loaf (this adds beautiful color). You could even add some seeds, or a garlic Parmesan topping to your bread or rolls. Bake until golden brown.  Keep an eye on it because everyone’s oven cooks differently so time varies. I bake mine about 15 minutes.

Hope you enjoy! Happy Baking

SAM_0590

Cousins Making Real Food Real Fun